
-
Untethered Teaching
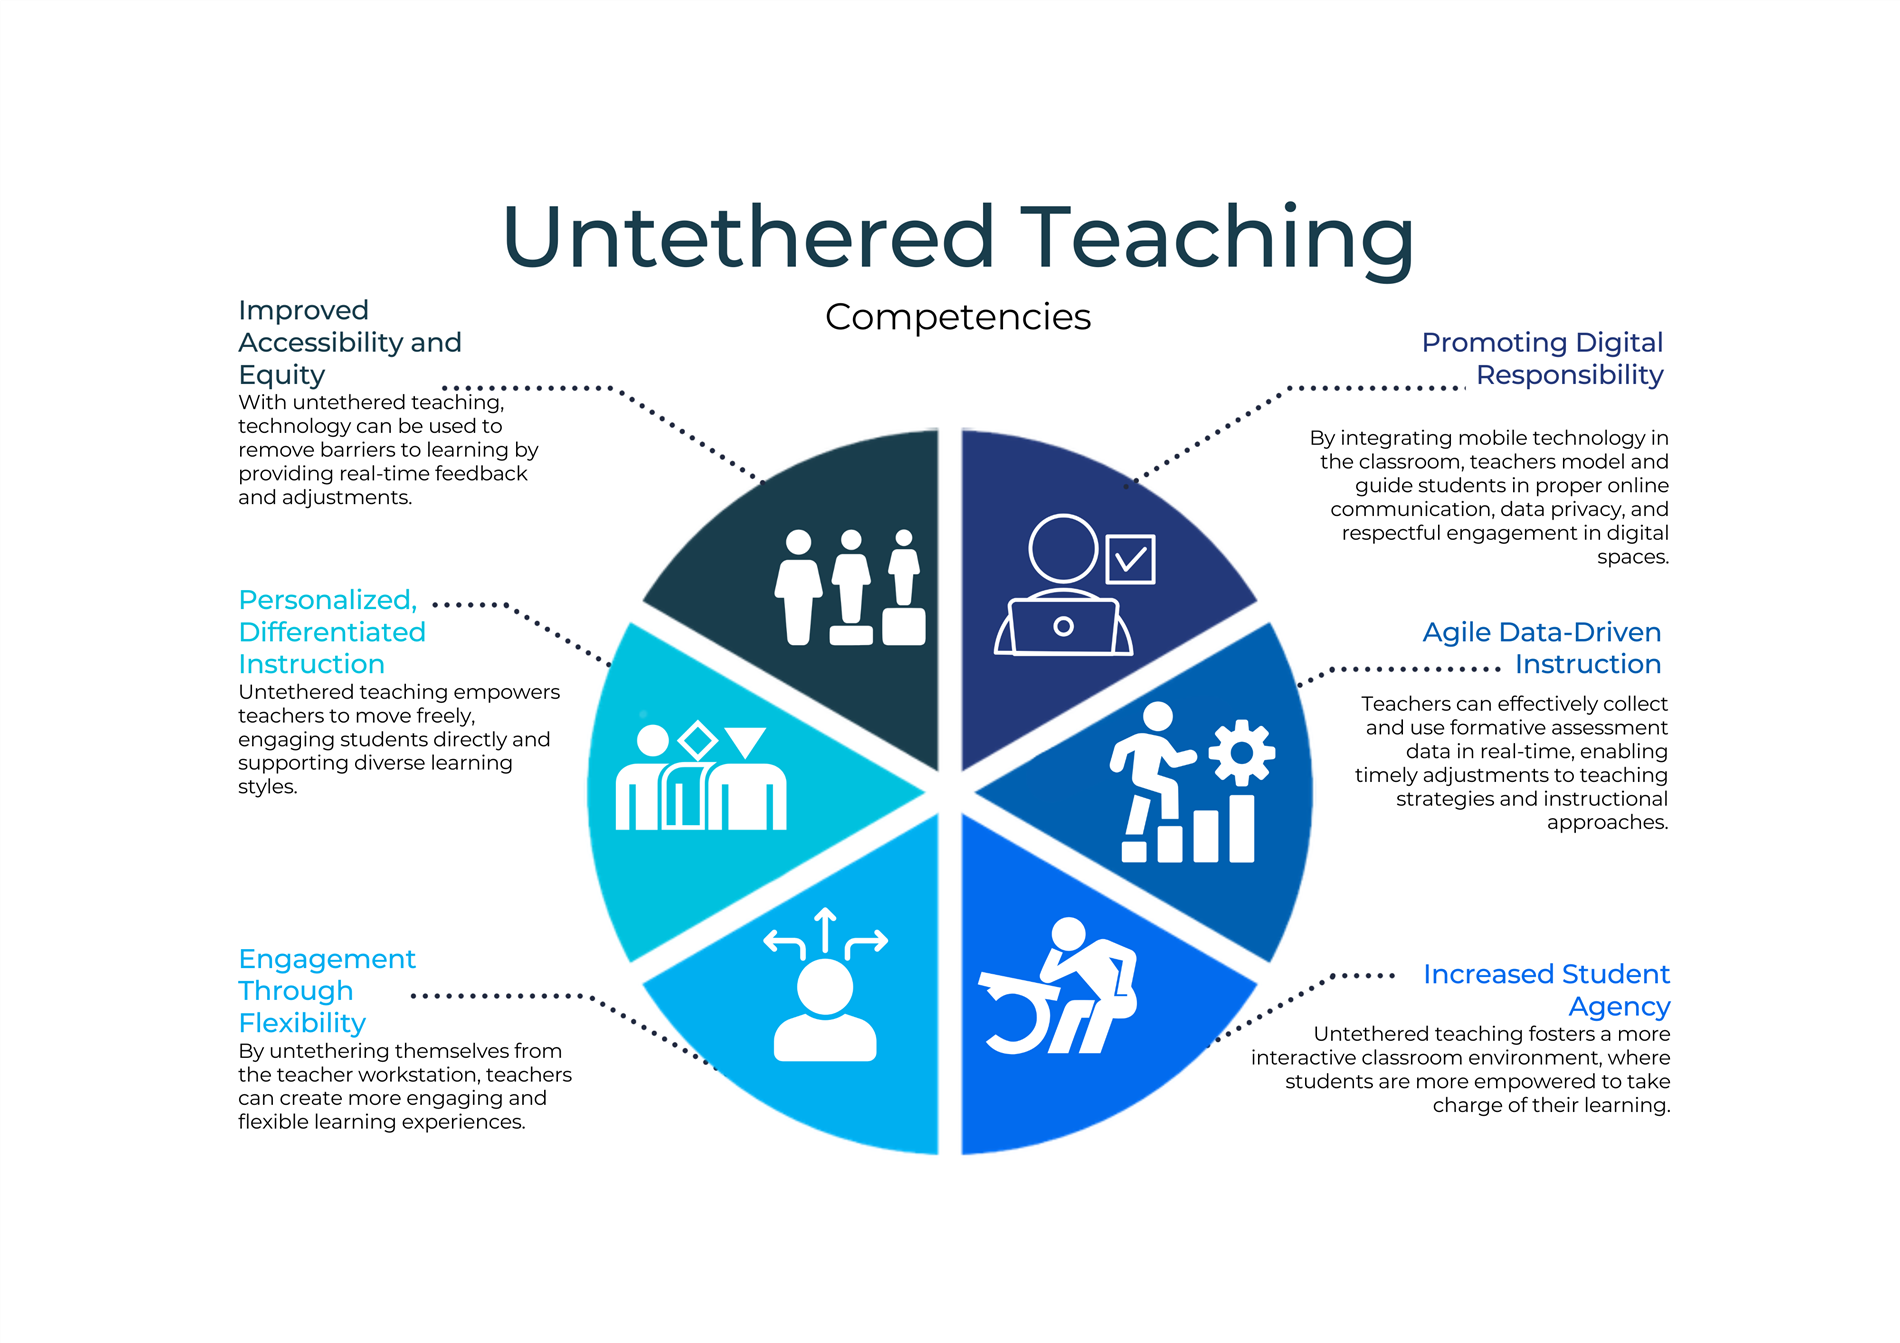
Embraces flexibility through the use of digital tools, mobile technologies, and innovative pedagogies, allowing teachers to interact with students in a more dynamic, real-time, and adaptable manner. With the tools provided - iPads, Apple TVs, and apps like Explain Everything, Pear Deck, and Canva - you can teach from anywhere in the room. This mobility allows freedom of movement and increased student engagement through interactive tools.
Click on image for larger display.
-
Skill #1 - Presenting from the iPad
Getting Started with Untethered Teaching Using Your iPad and Apple TV
To effectively teach untethered, begin by utilizing presentation tools on your iPad and mirroring them to an Apple TV. Here’s how to get started with key tools:
Google Slides
- Open the Google Slides app on your iPad.
- Select the slide deck you want to present.
- Tap the Present icon in the upper-right corner of your screen.
- When mirroring to Apple TV, choose Present to external display.

- Your slideshow will now be shown to the participants in full-screen mode through your display. The teacher's view on your iPad will show the current slide presented to your students, the previous slide, the next slide, speaker notes, and actions. See image below:

- If you have a link embedded in your slideshow, you will tap the blue bar at the bottom right where it says, "Actions available," to open the choices. Tap on the link you want to open, and the website will open on the iPad and be viewable to your participants on your main display. Tap "done" when you want to close your link, and you will immediately be brought back to your presentation.

Pear Deck
- Launch Pear Deck from laptop/desktop and project (directions here).
- To control Pear Deck from iPad, go to app.peardeck.com.
- Click Log in with Google and use your PISD credentials.
- A pop-up will appear with an Open Session in Progress message. If no pop-up appears, go to Session History and click on the active session.
- Select Open Dashboard.
- You can now use your iPad as a remote for your Pear Deck slide presentation.
Dedicated iPad Apps
The following apps are available directly on your iPad, and you will find their icons on your homepage:
- Seesaw
- Canva
- PowerPoint 365
Access Programs via Webdesk (Classlink)
You can access the following programs and more via Webdesk (Classlink):
- HMH
- SAVVAS
- Discovery Education
This setup allows for seamless presentations and teaching without being confined to a stationary device, giving you full mobility in the classroom.
-
Skill #2 - Annotating on the iPad
Annotating from Your iPad: Tools and Techniques
Annotating from your iPad offers real-time interaction, flexibility, and increased mobility in the classroom. This method enhances engagement, making lessons more dynamic and responsive to student needs while promoting collaboration and feedback. Below are the tools and approaches you can use for effective annotation:
Explain Everything (💲- District License)
- Paper Options: Use lined, graph, or blank paper to create notes or draw on a variety of templates.
- Worksheets: Upload and annotate directly on pre-existing worksheets.
- Scanned Images: Import scanned documents or images for quick annotations during lessons.
Detailed instructions can be found on our Hotspot page: pisd.edu/explaineverything and on the Explain Everything help center page
Google Slides
- Export to Explain Everything: To annotate Google Slides, export the presentation as a PDF and open it in Explain Everything for flexible, on-the-fly markup. Video Instructions
Notability
- Bring ideas to life with Notability (available as an app on the iPad)! This powerful and versitile, yet wonderfully simple note-taking experience facilitates annotating on the iPad with ease. Jot down thoughts, import & annotate textbooks, sync your notes with audio, or sketch your next masterpiece.
Detailed instructions can be found on the Notability page
Pear Deck
- Screenshot: Take screenshots of Pear Deck sessions and use markup tools to annotate directly on your iPad.
Canva
- Export to Explain Everything: After creating a design or lesson material in Canva, export it as a PDF and import it into Explain Everything for seamless annotation.
PowerPoint
- Embedded Annotation Tools: PowerPoint includes built-in tools that allow you to annotate directly within the app, offering a streamlined way to interact with your presentations.
By utilizing these tools, you can make lessons more interactive and cater to varying student needs, all while maintaining classroom mobility and engagement.
-
Skill #3 - Mobile Efficiency
Teaching from a mobile desk or setting up "learning hotspots" around the classrom requires some adjustments, especially in terms of planning, organization, and classroom management. Here are key considerations to keep in mind:
1. Prioritize Essential Materials
- Only bring the essentials: materials like your iPad, consumables, basic supplies (pens, sticky notes), and any quick-reference materials.
- Avoid overloading the mobile desk; this makes movement easier and ensures you have what you need without clutter.
2. Organize for Quick Access
- Arrange materials so they’re easy to grab without excessive searching. Use the container bins attached to the mobile desk for specific items, keeping frequently used tools on top or in accessible compartments.
- Use the bins for supplies like markers, whiteboard erasers, or tech accessories, minimizing setup time as you move.
3. Plan for Technology Needs
- Ensure devices like iPads or laptops are fully charged or have a portable charging solution, as outlets may not always be within reach.
- If using a digital whiteboard, try to set up screen mirroring and open your online tools before class begins to avoid disruptions.
- If you have wifi issues:
- Mirror your iPad and use the camera to take pictures of student work and annotate as needed.
- Use Remote for Slides to advance Google Slides on your laptop from the iPad to stay untethered.
4. Strategize for Movement and Flow
- Think about where and when you’ll move during the lesson. Arrange student seating to allow easy access to groups and avoid obstacles that could hinder mobility.
- Plan “checkpoints” around the room to keep track of all students and maintain presence without needing a fixed location. This works well if you are not able to safely move the mobile desk around your classroom.
5. Set Up Visual and Audio Tools Effectively
- Use the Lightspeed microphone. This ensures students hear you without needing to stay near the front.
- If sharing visuals on a projector or screen, use screen mirroring from the mobile desk, so you can interact with content while moving around.
6. Emphasize Flexibility in Teaching Approach
- A mobile desk enables a more fluid teaching style; embrace a facilitative role by circulating the room, engaging students directly, and encouraging hands-on work.
- Try to spend more time guiding or coaching rather than delivering lengthy lectures; this approach is more conducive to the flexibility a mobile desk provides.
7. Set Boundaries and Expectations for Students
- Establish clear classroom routines so students know what to do even when the teacher isn’t stationed in one spot. This includes transitions, group work expectations, and what to do if they need help.
- Regularly remind students of procedures for when you’re moving, like how to get your attention or when it’s appropriate to ask questions.
8. Adapt for Small-Group and Individualized Instruction
- Mobile desks make it easier to work closely with small groups or individual students. Take advantage of this setup to personalize learning and provide targeted support.
- Bring assessment or observation tools to jot down notes on student progress as you work with each group or individual, allowing you to keep a record without returning to a fixed desk.
9. Encourage Student Independence
- When teaching from a mobile desk, encourage students to take more responsibility for their learning and classroom environment.
- Assign classroom jobs or roles that help manage supplies, technology, or transitions, reinforcing student ownership.
10. Evaluate and Adjust Regularly
- Reflect on what worked and what didn’t with the mobile desk setup, adjusting materials, routes, and teaching style as needed.
- Ask students for feedback on how the mobile desk impacts their engagement and participation. Small tweaks based on their insights can make the approach even more effective.
A mobile desk can create a more interactive and flexible learning environment, so by keeping these points in mind, teachers can maximize the benefits while minimizing potential challenges.
Crowdsource Mobile Desk Ideas from PISD Teachers - Padlet will open in a new window. You will need to click "Sign in with Google'" using your PISD email.